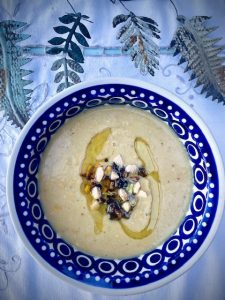
Cauliflower-corn soup

I love this recipe which is an altered version of  Anna Jones’ chowder.   Sometimes I find chowders too bland or too heavy-creamy or too coconutty, so I tweaked the original to our taste – a bit more of this, a bit less of  t’other – and am calling it a soup instead of chowder.
It’s quick and easy to prepare and has elicited several yums around the table when I’ve served it to friends.  Definitely my happy new recipe for 2024.

There are several herb and spice options, depending on your likes.   In this recipe I’m suggesting 8 crushed dried curry leaves and/or a generous tsp of ground garam masala in the cooking.
However, if you don’t fancy these spices you could just add chopped any-herb-you-love as a finishing touch with the rest of the topping; either coriander, parsley, basil…

Ingredients

Serves 4
Dollop of olive oil for the pot
1 leek, thinly sliced
4 cloves garlic, crushed
8 dried curry leaves
1 tsp ground garam masala
600g cauliflower, cut into florets (leaves removed and shredded for topping)
2 tins (260g each) corn, or frozen corn, or fresh kernels from 4 cobs of corn
1/2 400mg tin ie. 200mg coconut milk (you can cover the remaining 200gm in glass jar; refrigerate up to 3 days)
900 ml rich veg stock
juice of 1 lemon

Topping

4 spring onions, finely sliced
about 3-6 cauliflower leaves depending on size.  Stripped from the stem (or not, if the stem isn’t tough)
olive oil to drizzle
3 tbsp almonds, roughly chopped (& roasted if you have time)

Method:

Heat the oil in a large pot and add the leek.  Cook on a medium heat for 10 minutes until soft, but not charred.
Add the garlic, garam masala/dried curry leaves (crushed with fingers), a pinch of sea salt and pepper.
Pop in the broken-up cauliflower, most of the corn – save about 20 kernels for the topping -, the veg stock and coconut milk.
Bring to the boil then reduce the heat to a gentle simmer for 20 mins until the cauli is soft.

Use a hand-held blender to loosely blend so it still has some texture.
Add the lemon juice, taste, then perhaps more pepper or salt or lemon, then taste again and adjust to your version of perfect.

Topping:

Add a little olive oil to the pan then toss in those 20 kernels, the sliced spring onion and as many shredded cauliflower leaves as will balance nicely with the rest (I shredded 6 small leaves but stripped them from the white stem as it was very tough!)
When the corn is charred and the greens wilted, add the chopped almonds. You can toast these first if you have time on your hands.  I used some delicious Spanish Marcona almonds because they were there.
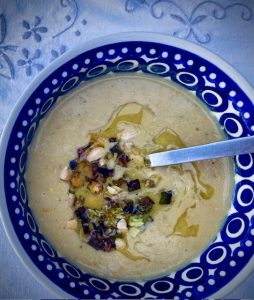
Scatter this lovely green, nutty mix on top of the soup with a drizzle of olive oil.

Buon appetito!

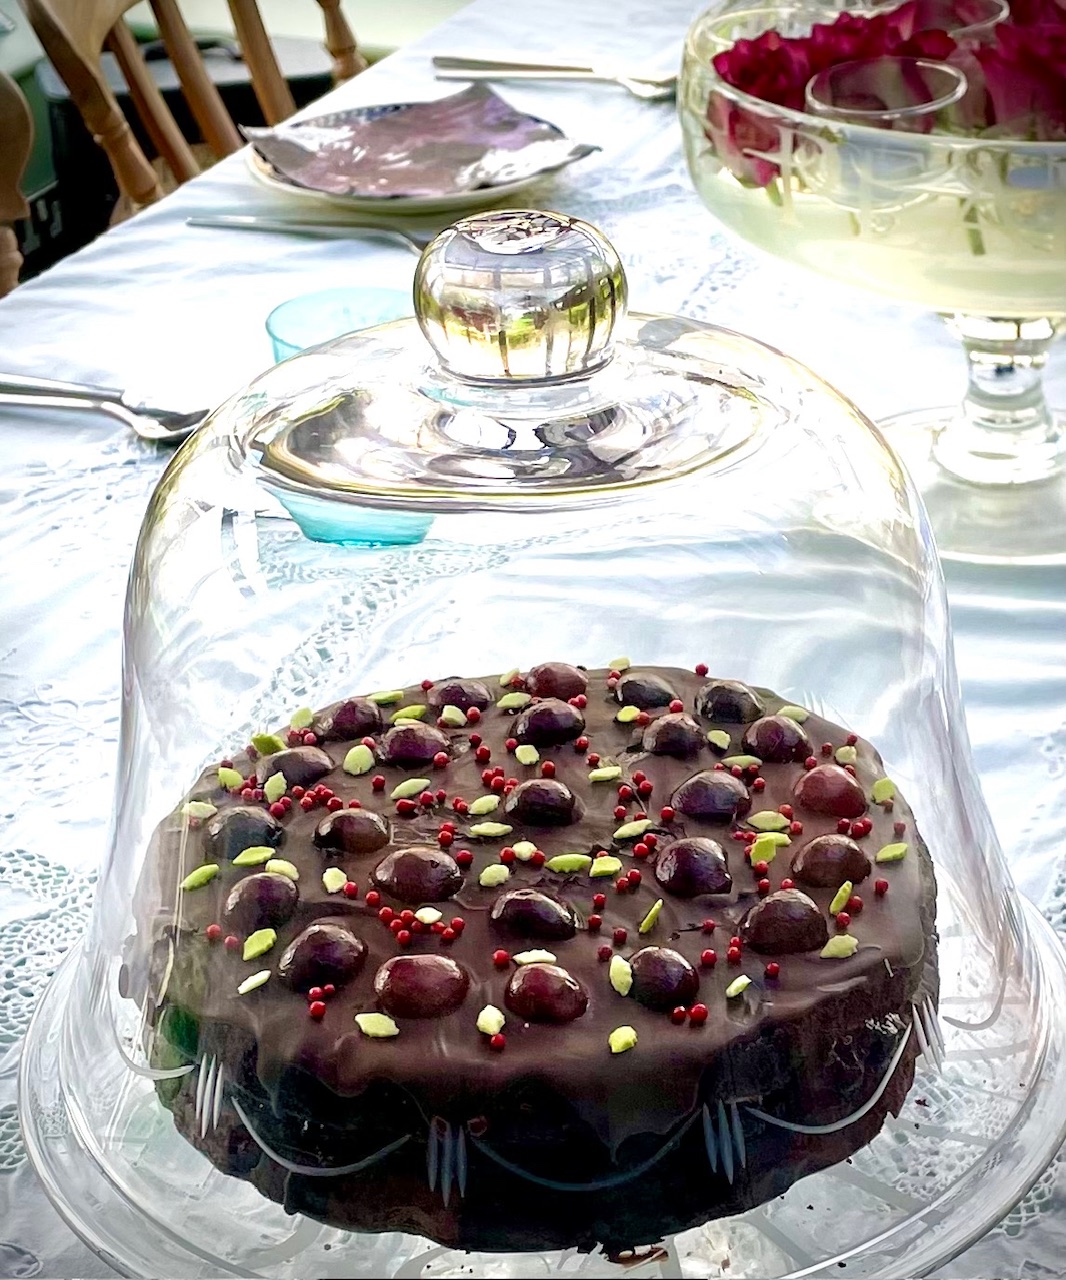
Gluten free choc-cherry celebration cake

I’ve baked this cake a number of times since the summer.  The original recipe, a single chocolate ‘Luscious’ cake, is from Naomi Devlin and it stands deliciously alone, as do all her recipes.  The list of ingredients may look busy but it’s easy, quick and delicious, three important words for anyone whisking in the kitchen.

My recipe below is a swerve from the original as I’ve been wanting to recreate a gluten-free version of a deeply chocolate-cherry cake my mum used to bake.  I also wanted a cake with stilettos for birthdays or Christmas, a two layer cake with a cherry jammy centre and/or whipped cream (here I’ve used Oatly’s dairy-free whippable).  Use two 23cm cake tins – or bake one after another if needs must.

This cake still works beautifully without the height.  The recipe below is for a single cake so just double the ingredients as per instructions for the stiletto version.  You can also do your own swerve and decide on a jam-only centre or jam and cream, up to you.
Most supermarkets sell jars or cans of pitted cherries like morello, so you don’t have to fiddle with removing the pips from fresh ones.  Saying that, I did a version with fresh cherries on top and it was scrummy, but do warn guests.


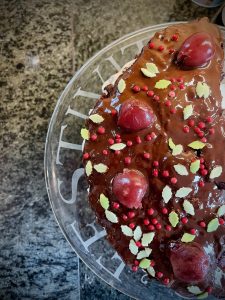
Add sprinkles of something over the chocolate topping, either sieved icing sugar or rose petals or some sugared mini holly and berries which I spied in the cake-baking section of the supermarket.  This cake is definitely going to be on our festive menu this year.

An aside about oat cream:  even though oat milk/cream contains beta glucans, which helps maintain healthy cholesterol,  Oatly cream has a similar saturated fat content to normal dairy whipping cream despite some online info saying otherwise.  Also, some blogs state the calories per 100ml are 150, however the Oatly box small print is telling me 253 calories per 100 ml.  Is it me needing glasses??

Ingredients for one cake.

Note: Double these if baking a stilletto version

120g white rice flour (brown is fine but a bit heavier)
125g plant milk – I used semi oat
55g diced butter or 45g olive oil
150g light muscovado or caster sugar
60g cocoa powder
3 tsp gf baking powder
1/2 tsp ground psyllium husk
1 tsp sea salt
1 tsp vanilla extract or 2 tsp ground cardamom
1 large egg (Naomi’s original Luscious cake suggests an egg-free version I’ve not tried, hence not here)
125g hot boiled water
One can of pitted cherries (you want to drop about 15 in each cake which leaves some over to add to porridge the next morn, or to the next cake you bake the following week.  Refrigerate and store in tight container)
Any cherry (or berry, if you will) jam for the centre
100-125 ml whipped Oatley or dairy cream

Chocolate topping:

100g dark chocolate
3 tsp butter or olive oil

Method

Line a 23cm cake tin or two 23 cm tins if you’re baking a double with jammy/cream filling.  You can also use the same tin and bake one cake after another, not energy friendly but it works, and not everyone has two 23 cm tins!
The batter is quite runny so make sure you use tight-fitting tins and line well with baking paper.

Boil the kettle as you’ll need 125g hot water for this cake, plus a cup of your fave tea whilst you’re baking.

Place the rice flour in a heat-proof bowl whilst you heat your plant or regular mylk to almost boiling.  Pour the mylk/milk into a jug and add to it 125g boiling water from the kettle.
Pour the hot liquid into the bowl of rice flour and whisk with intention until it’s velvety smooth (Naomi D explains that by doing this you’re ‘precooking the rice to get rid of the rice grittiness.’ )

Add the butter to your hot rice mix and let it gently melt it (or gently stir in the oil) whilst you take another bowl and sieve the dry ingredients: muscovado sugar, cocao, baking powder. Add your salt and ground psyllium husks.  Now the smooth rice mixture goes into the dry ingredients then whisk in the egg and vanilla.

Pour the batter into your tin(s) and let them stand whilst you heat the oven to 180C or 350F (fan) or 200C/400F (no fan).  Whilst standing the baking powder is apparently beginning to work its wonder.

Bake for approx 35 minutes.  To see if it’s done check the edges have pulled slightly away from the tins, and a wooden skewer comes out clean.
If not leave another five or ten minutes.
My cake timings often change depending on whether two cakes are baking at the same time.  I’m also convinced seasons play a role in the making, even though the oven temperature is what it is in the baking!

With the stiletto cake, ie. double the above ingredients, and two tins, ensure your jam is spoonable by giving it a short whisk beforehand.  Spoon about 4-6 tbsp (very individual) onto one half then use a spatula to gently add the whipped cream.

For the topping, put the broken up dark choc into a bain marie with the butter or oil.  Let melt and give a gentle stir to mix – don’t overstir or it may congeal, in which case add a little more butter and briskly whisk.

I use a tablespoon to dollop it onto the top then the back of the spoon to smooth it out on top.  I do let some drips of chocolate slide down the sides… but this topping is exactly what the name says and not a siding as well 🙂

Add your sprinkles or sieved icing sugar when the topping is set – and enjoy with your favourite beverage.

Have a merry one!

Vegetable wraps

As wonderful and tasty as they are, not to mention a blessing for anyone who’s gluten sensitive or coeliac, the array of gluten free flours can at times be overwhelming.  Especially if you haven’t planned ahead and stocked up on the ones you need.  I love cooking with a variety of gf flours, have shared recipes here, but sometimes I just want to open the fridge and find an instant solution rather than start baking.  Something fresh, not ready-bought, which I can fill with salad, or delicious protein whether lentils, salmon, tofu, chicken or scrambled egg.  Quick, delicious and easy.

Cos or Romaine lettuce:

Filled lettuce leaves aren’t new in cooking but they may not be on your radar.  I love Cos or Romaine because it holds its form and therefore the contents, plus it has a delicious crunch which adds to the whole eating experience.

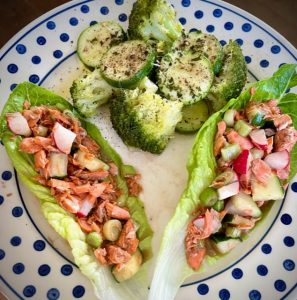
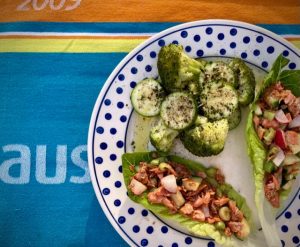
Here in the photo I cooked a filet of wild salmon in a fish broth, removed it, let it cool then flaked it, adding 3″ of cubed cucumber, 5 chopped cherry tomatos & radishes.  The dressing could be olive oil with lemon or a dash of apple cider vinegar but I wanted an Asian flavour, so I used juice of a lime, finely chopped lime leaf (easy to keep in the freezer),  1/2 finely chopped crushed stalk lemon grass (outer tough leaves removed), 1 heaped tsp tamarind paste, sesame oil, splash of water).
Easy to spoon into the Cos leaves and serve at room temperature.

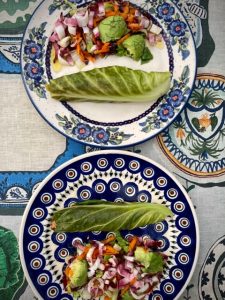
Another time I filled the Romaine with a Greek-type salad and served it alongside the following…

Eggy Portabellino mushrooms:

We love scrambled egg with fried mushrooms, so when I saw these perfectly formed portabellino ‘cups’ in the photo below it seemed worth a try.

I filled the small ‘shroom cups with a beaten raw egg + salt,pepper,tumeric + spring onion.  A bit of a fiddle since these four tiny ‘shrooms didn’t even take a single beaten egg.

The trick to filling the ‘shrooms turned out to be filling them ‘en place’.  Put the empty portabellinos on an oiled oven tray, or matt (no heat yet of couse) then use a small jug to gently pour in the mixture.  A steady hand required, but a rewarding result.  I’ve been eyeing up lots of different mushrooms since then, looking for bigger ‘cups’!

In the end, two raw beaten eggs filled 10 small portabellinos.  Added to the plate of Cos leaves filled with a Greek-ish salad it was lunch AND dinner.
Cooking time for the shrooms with eggs was about 12-15 mins in a medium oven.  Just ‘tap test’ to ensure the egg has set.

The salad I served alongside was what I had at hand.  More chopped tomatoes, cucumber, chopped radish, avocado, cubed fetta (Violife vegan, or regular), chopped fresh fennel.  The dressing was our olive oil, lemon juice mixed with a dash of water, pepper and pressed garlic.

Wilted white pointed cabbage leaves:

Another easy wrap is to wilt cabbage leaves.  I made a very simple lentil-rice mixture to fill them.

Cook about two cups of mixed rice (black, red basmati – great texture, good fibre) in boiling water, then place a steamer attachment on top with one large cabbage leaf per person.  I usually cut away the thick end of the central vein before steaming if the cabbage seems especially tough.  You could use Savoy or Purple cabbage, any firm cabbage, although the latter has a more distinctive taste (which may improve your meal, so go for it!)  However, as the latter always reminds me of Christmas I tend to stick to Pointed or Savoy.

The leaves only need about 5-8 minutes to wilt.  Keep an eye on them as you don’t want them to overcook and tear. Remove and cool.

For speedy meals I buy Merchant cooked and vacuum packed lentils.  I mixed half the packet in the pot for the last few minutes of cooking time, to heat through. Then I added chopped fried onion, finely chopped coriander, roasted pine nuts, freshly ground pepper or a dash of dried chilli, for heat lovers.  If you have left overs it’ll keep in the fridge for a couple of days and add it to soups, to salads –  or put a few spoonfuls in some Cos lettuce leaves.


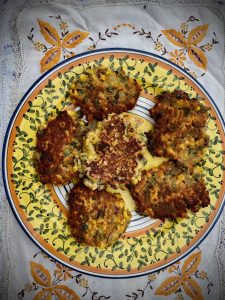
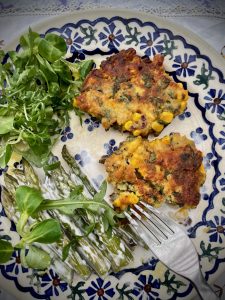
Gluten free corn fritters

Corn fritters are often popping up on brunch menus, and for good reason.  They’re not just delicious but super quick to make.  Here’s an easy gluten free recipe you can adapt to your tastes by adding different herbs, the ones you love.

The first time I made them I thought I was being organised by making the batter the night before.  Not a good idea.  The second time I wondered why I’d even thought they needed ‘preparing’.   No need, becauste this recipe is so quick and easy.   Last time I made the batter just as a friend was parking outside the house.  I spooned dollops of the corn mixture into a hot pan as she walked in the door, took off her coat.  By the time she reached the kitchen the fritters were almost done.

I’ve made them with parsely in the batter or with coriander and last time, with mint, delicious!  So this is the the recipe I’m sharing.  Super quick and easy.

Eat alongside salad or asparagus, eggs or with guacamole, mushrooms, tomatoes…  You name it, these corn fritters will sit happily on the plate with any crowd of food!

Ingredients

(for 4; to eat with the above suggestions)

2 large corn cobs, cooked and kernels removed OR tin of 400g canned kernels
2 eggs, beaten
40g brown rice flour
30g buckwheat flour
1 tsp gf baking powder
generous roughly chopped handful mint (and/or parsely, coriander…)
1/2 small red onion, finely diced
1 heaped tsp curry powder or garam masala powder, whatever you prefer
olive oil to free (or coconut oil)


Method

Measure out 160g of the corn kernels, add the two eggs and blend in a food processor so it’s still a bit chunky.  Add the flours, baking powder, curry powder, salt and pepper to the processor and pulse again briefly to mix.

Pour into a bowl and stir in the chopped onion, the mint and remaining corn kernels.  Add olive oil to a pan and when it’s warmed up, use a tablespoon to scoop a dollop into the pan, flatten slightly so its about 1 – 2cm thick.  Continue until you have used up the mixture.  They only need about 3 or 4 minutes on each side.  Serve warm with any side dishes you love.

What’s chai all about?

We may think of today’s chai and chai latte as being a novel drink but it actually began life over 5000 years ago in India, when a king supposedly ordered his Ayurvedic doctor to make a healing spiced beverage.

Back then in India, chai was a concoction of warming spices and milk with no tea at all.  It was definitely a far cry from the processed powdered or syrupy mixes we find today in many cafes and supermarkets.  Most of these sweetened chai ‘teas’ have nothing to do with the original beverage with its warming spices and antioxidant and anti-inflammatory properties.

Some teae facts:

The word chai is Hindi for tea.  Hence chai tea actually translates to tea tea, which must generate a few chortles by anyone who speaks Hindi.  The Indian Masala chai (= spiced tea) is a closer fit to our current western chai drink.

Just to confuse things more, the Indian word chai comes from the Chinese for tea, cha, which makes sense as that’s where the story of tea began, back in 2737 BC, apparently.  Whether this date is accurate or not, containers of tea were found in tombs dating back to the Han dynasty around 206BC.  By 618 AD it had become the national drink of China.  Extraordinary that it wasn’t until the 16th century that tea made its way to Europe, when Dutch merchants sent a consignment back to Holland.  The cost, however, was prohibitive so it remained a drink only for the wealthy classes.

It was in the mid 1800s that the British decided to curb the stronghold China had on tea production by planting regions of India with these camellia sinensis bushes (sinensis = Latin ‘from China’).  These thrived in the climate – and continue to thrive.  China, however, is still the biggest tea producer in the world with India following second place.

Back to chai:

It seems that at this point, in the mid 1800s, black tea made its way into the Indian masala chai milky spiced drink.  It didn’t catch on locally as black tea was still too expensive.  According to an online article in  The Spruce Eats it wasn’t until the 1960s that masala chai with black tea became more popular in India, mainly due to tea production becoming mechanised and more affordable.

The two black teas most often found in traditional chai are Assam and Darjeeling, both native to India.  However, these days we use everything from green tea to yerba mate and red rooibos – or no tea at all, just the spices with milk.

What spices are in your chai?

It’s easy to make your own spiced chai or chai latte.  Here are various spices you could use, some more common to chai than others.  if you’re only using spices they should steep in boiling water for about 15 minutes.  If adding tea, then 5 minutes is the time recommended.  When I made my chai latte I steeped the spices first and then added the tea after 15 minutes, for another 5 minutes.  And then the frothed oat milk.  It was delicious and well worth the process!
The health benefits of chai will depend on the spices used, although you’ll see that most of them support digestion.

Most traditional chai includes cardamom, a spice which helps with a wide range of gastro intestinal complaints, from nausea to bloating,.  Chewing on the seed can certainly improve bad breath.  It’s a calming anti inflammatory spice with similar anti bacterial properties to clove.

Ginger is another common chai component with its gingerol oil giving that distinctive spicy flavour.  It’s such a powerful antioxidant and anti inflammatory its health benefits range from digestive and nausea support to anti bacterial effects, blood balancing support and much more.

Cinnamon is another common spice, with a plethora of health benefits due to its antioxidants which in turn have anti inflammatory effects. I’ve read claims that it can reduce CRP, a marker for inflammation, but haven’t found more than just the claim.  Its blood sugar benefits are well documented, not just by improving insulin sensitivity, but also slowing down the amount of sugar entering the blood after a meal.  Cinnamon’s oil, cinnamaldehyde, accounts for a lot of its antimicrobial and anti-parasitic properties.

Clove is another common spice in chai (you only need a teensy amount as it can completely take over).  This is another digestive supportive spice, and also an antioxidant and an anti inflammatory.  Its eugenol oil acts as an antiseptic, hence the reason for its traditional use in dentistry and in toothpaste and mouthwash.

Other spices you might like to add to your chai are black pepper or fennel (the latter are in my above photo).  Again, its volatile oils such as rosmarinic acid and chlorogenic acid, as well as quercetin and apigenin, add to its antioxidant benefits and antimicrobial, antiviral properties.

Star anise or aniseed is another possible addition to give chai that distinctive sweet, but more licorice, taste.  Aniseed is known for digestive support and is an anti-spasmodic a.o.  Digestive support supplements and teas often contain anise eg. Floradix has an anise-caraway-fennel herbal tea which can help with flatulence, constipation and bloating.   Aniseed has similar blood sugar balancing properties to cinnamon by regulating certain digestive enzymes involved in carb metabolism.  The main compound of star anise oil, anethole, is said to be effective as an antimicrobial, so one can assume it’s another effective herb for oral health, killing bacteria and improving bad breath.

Recently I discovered Celestial seasonings make a wonderful Bengal spice tea, which has become a daily treat of late.  Three quarters of a cup of boiling water steeped for 15 minutes then topped with frothed oat milk, delicious!  It satiates and satisfies any itch I may have for a sweet treat.
When I read the list of ingredients on the Celestial Seasonings box I can well imagine it is very similar to the original healing spice mix that king in India asked his ayurvedic doctors to put together some 5000 years ago.

Let me know how you get on with your chai recipes!


Credits:  Thank you to Healthline, Future Generation Co, Holy Cow Chai history, The Spruce Eats,  Amala Chai, The Tea Kitchen for some fascinating reads and chai tea facts.


Parsnip mash, mushrooms and egg brunch

Just slipping in this delicious gluten free brunch before February vanishes.  It’s a yummy combination of parsnip, mushroom and optional eggs.  We ate it in Amsterdam on our last road trip in a cafe not far from Oosterpark.

I’ve changed it a bit, taking away the toast and white chocolate (?!) and adding a splash or three of truffle oil to the mushrooms.  I know truffle flavour can be a marmite thing, either you love or hate it, so if you’re not a fan just leave it out.

A simple and easy recipe and not a combination I’ve tried before, and perhaps it’s new to you as well.  Hope you like it!

Ingredients for a twosome brunch:

2 organic parsnips, roughly chopped (peel if not organic)
300g mixed woodland or shiitake mushrooms, roughly chopped
2-4 softly boiled or poached eggs (either 1 or 2 eggs each)
3-4 tbsp oatmilk or oatcream (for the mash)
olive oil
truffle oil
small handful chopped parsley
cress for decoration
sea salt, pepper to taste

Method:

Whilst you boil the parsnip chunks, lightly fry the mushrooms in a little olive oil, adding the finely chopped parsely and pepper and sea salt to taste.  Keep warm whilst you either poach or softly boil your eggs.

Drain the parsnips, add oat milk or oat cream and season, then mash or blend, however you like the texture.

Drizzle your truffle oil on the mushrooms then layer up your dish.  Parsnip mash as a base, then mushrooms topped with the eggs.  Top with cress or more fine parsley, easy.


Slow-cooked venison

Christmas lunch this year was an unknown until the week it was happening.  The recent avian flu outbreak in UK, and the subsequent exorbitant prices for organic turkey and chicken, put paid to our traditional Christmas bird.  So when a friend mentioned a delicious recipe for slow-cooked venison I thought I’d give it a go.
This recipe freezes well so I cooked it in advance, then defrosted it for Christmas morning, making the day in the kitchen so much easier, esp as our two giant elves were busy with their own creations for the feast.
I used a large deep pan with lid and cooked the stew for three hours on the hob, where I could keep an eye on it!
After defrosting, it simmered a further hour and a half on a low heat.

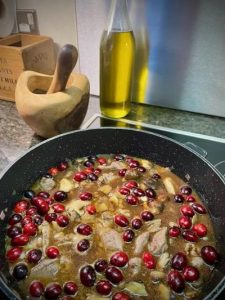
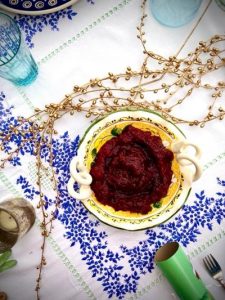
I’m not practised at cooking red meat but ‘slow cooked’ for me is always reassuring and a healthier way of cooking.  After reading a few different recipes I merged a couple which gave me elbow room to add more plant-based ingredients, including the home-made cranberry sauce below, which I added to the stew and to the table, as a side dish.

If you’re going to eat red meat at least venison is one of the healthier options as it’s the lowest in saturated fat (I’m  on a cardiovascular protective journey given my parents and grandparents all had CV health issues).
Venison is also high in zinc, such a great antioxidant,  although to be fair, not as high as Sydney rock oysters!  and it has a good dose of B vitamins, always handy around Christmas time for their nervous system support 😉

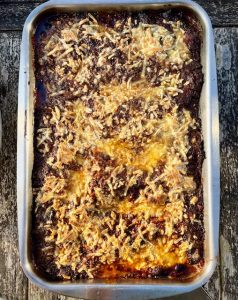
The meal was such a hit it was requested for New Year’s Eve, so this is it in the photo above.  Less meat than you may think as there are lots of mushrooms and chestnuts pretending to be venison.

Bon appetit, and wishing you all a happy 2023!

Ingredients: 4-6 people

3 tbsp olive oil
1 large red onion, finely diced
900 g venison, cubed
3 garlic cloves, minced
ground pepper, some sea salt
3 tbsp tomato paste
1 heaped tbsp cranberry sauce
250-300g shiitake or mixed woodland mushrooms, sliced or chopped
150g cooked chestnuts
100g fresh cranberries
140 ml broth, either veg or beef
250 ml red wine
2 tbsp worcestershire sauce (I used 1 heaped tbsp low-salt marmite – yes, that is a thing – and it works well if you’ve run out of W. sauce)

Method:

Heat the oil in a deep pan – or your slow cooker – then braise the venison cubes over a medium heat.  Transfer to a bowl, then gently fry the sliced onions and mushrooms for about 5 minutes until they’re soft.
Add the garlic, tomato paste and cranberry sauce plus a little sea salt and ground pepper.

Now the meat goes back in the pan – or your slow cooker.  Stir in the chestnuts, cranberries and the liquids: broth, red wine & worcestershire sauce (or marmite).

Gently combine, cover and cook on a medium heat on your cooker for c 3 hours.  Reduce the heat to low for another hour.  If using a slow cooker, cook on high for about 4 hours or low for about 7 hours.

We ate our venison stew with mixed basmati, wild and red rice on New Year’s Eve but I’m sure mashed potatoes would also be delicious.
Sprinkle with thyme leaves before serving and enjoy!


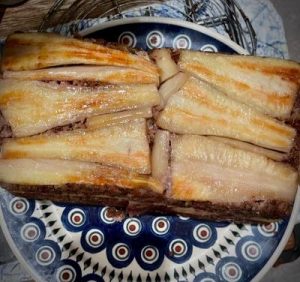
Christmas parsnip loaf

This loaf is a perfect Christmas dish containing all the typical seasonal ingredients: cranberries, chestnuts, sage and parsnips.  It’s easy to prepare the day before, just cover and chill until ready for the final stage of baking.  I use ground almonds as a gluten free option to breadcrumbs although the latter probably helps hold it together better, so your choice here!

Ingredients

For a 900g loaf tin to serve 4 generous portions:

3 tbsp butter
3 red onions, chopped
8-10 sage leaves, torn, plus 8 extra leaves for the sage butter
220g packet of cooked chestnuts
130g walnuts or pecans
100g ground almonds (or 100g breadcrumbs)
1/2 tsp allspice or mace
2 beaten eggs
600g cranberries
120g caster sugar
550g parsnips, preferably long and thin

Method

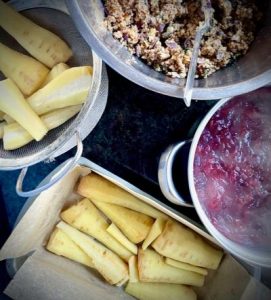
Melt 1 tbsp butter in a large pan and cook the chopped onion over a gentle heat for about 15 minutes until soft.  Stir in the chopped sage until it slightly crisps, then transfer to a large mixing bowl.

The nuts:

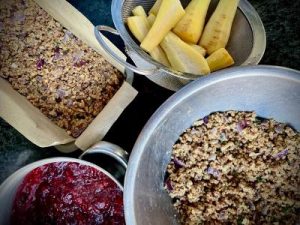
Pulse the chestnuts in a food processor until chopped  but you want to have some texture, not nut dust!  Repeat with the walnuts/pecans.  Transfer these to the same mixing bowl then add the ground almonds (or breadcrumbs), allspice or mace, the beaten eggs, some sea salt and freshly ground pepper.  Mix well.

The cranberries:

Put the cranberries and caster sugar into a pot and simmer for about 10 minutes over a medium to high heat.  As the sugar melts and cranberries pop it will become thicker and eventually sticky. Set aside to cool.

Grease your 900g loaf tin. Line it with baking paper, covering the base and ends.

The parsnips:

Halve lengthways then boil for about 3 mins and drain well.  Cut and layer the parsnips so they fit snugly (see ‘layering’ section next).  Any left over parsnip pieces can be chopped and added to any empty spaces, or roughly chopped into the onion/nut mixture.

Layering your loaf:

Heat the oven to 160 C (320F).  After a bottom layer of snug soldier parsnips, add 1/3 of the onion/nut mixture and press down firmly.
Next, add 1/3 of the sticky cranberry mix, leaving a small gap round the edges to stop it leaking when cooking, and thus sticking to the baking paper.
Repeat the last of the parsnips followed by another 1/3 of nut mix and another 1/3 of cranberry.  Finish with the final nut mix, pressing down firmly again.  Put the final 1/3 of sticky cranberry into a pan, adding some water and heating until it is more like a sauce.

Cover with baking paper then bake in the 160C oven for one hour.  Remove the baking paper from the top for the last 10 minutes to slightly crisp.

To serve:

Melt the remaining 2 tbsp butter in a small pan and sizzle those sage leaves you put aside at the start, until they crisp.

Using a rounded knife gently loosen the sides of the baked loaf and turn out onto a plate.  Drizzle with the sage butter and leaves and serve in slices, with extra cranberry sauce on the side.

Have a great Christmas!


Beetroot orange salad or its haloumi cousin

It’s been too long since I’ve shared a recipe but I promise it has not been due to lack of cooking or food inspiration.  This year I’ve spent far more hours helping clients put meal plans together, so yes, I’ve been very busy adjusting or concocting recipes but I’ve had less time to share them here in writing.
And now that it’s freezing outside in Dorset – in most of UK in fact – when everyone is hankering for steaming stews or warming soups I’m about to hand you some salad ideas!
(Well, it’s warm somewhere in the world right now 😉 )
There is some method to my madness.  What I’ve found over these past cold weeks is that I’m still wanting to keep the fresh crispness of salads in my life.  By adding a warm component to the salad leaves – in this case cooked warm beetroot – it’s proving to be a delicious accompaniment to our caper wild salmon or roasted chicken.  And it’s satisfying my craving for crispy fresh, raw veg.  Is this me trying to hang onto the hot summer?

Another easy version is to keep the core family together, ie. the salad leaves, orange and poms, but replace the warm beetroot with grilled slices of haloumi, equally scrummy.

Enjoy, and do share some photos of yours  x

Ingredients:

Rocket or any mixed leaves for your salad base.  Your choice how much!
1 large orange, segmented (remove the white membranes if you have time on your hands)
3 medium beetroot, cooked then remove skins and quarter or cube the beets
3-5 tbsp pomegranate seeds
sunflower seeds to sprinkle

Ingredients for dressing:

Add to a jar:  the juice of 1/2 orange and 1/2 lemon, a generous dollop of virgin olive oil, 1 pressed garlic clove, sea salt and some water to bind the mixture. Shake, taste and adjust x

Method:

Simply layer your salad by starting with the mixed leaves, then adding the warm (or cold, your choice) cubed/quartered beetroot and segmented orange pieces.  Then finally sprinkle those glorious pomegranate seeds on top, and that’s it.  The joy of this salad is that the fabulous tastes are what sell it, not any complicated prep or cooking.

Cypriot grain salad

This is a delicious salad a friend brought to the table on my recent trip back to Sydney when a gaggle of us got together for a catch up feast.  It’s inspired by the ‘Hellenic Republic’ grain salad recipe by Melbourne chef George Dimitrios Calombaris.


Instead of freekah (cracked wheat) I used quinoa only because I didn’t have freekah in my pantry.  It’s a good gluten-free option although be aware that pseudo grains like quinoa can be a problem for grain-, or gluten-sensitive peeps.
I also used dairy-free coconut yoghurt as that’s what I had at hand – and with that the salad morphed into a vegan recipe!  And even though df yoghurt doesn’t sound very Hellenic it was absolutely delicious with the cumin and pomegranate swirled in it.  Also I snuck in some rocket because I love leafy greens and it’s such an easy way to get more into your daily diet.
All in all, this is a well-rounded dish with all the macronutrients you need, so enjoy it on its own, or alongside other dishes for a feast.  Last week we ate it as a side with falafel, very yummy.


Ingredients

(serves 4)

100g red and white quinoa (or freekah)
100g Puy lentils
1 bunch coriander, chopped
1 bunch parsely, chopped
handful rocket or any salad leaves you like
1 small red onion, finely chopped
2 tbsp (c 30g) toasted pine nuts
2 tbsp toasted flaked almonds
2 tbsp toasted pumpkin seeds
2-3 tbsp small capers
70g currants
3 tbsp extra virgin olive oil
1 lemon, juiced
100g pomegranate seeds (or a whole pomegranate)
100g Greek yoghurt or dairy free alternative
1 heaped tsp ground cumin

Method

Boil the Puy lentils and quinoa separately in water until cooked to your liking.  Drain and cool.
In a bowl, add these to the chopped herbs, toasted nuts and seeds, capers, currants, lemon juice and olive oil.  Mix well and then stir in the rocket or salad leaves.
Add the ground cumin and pomegranate to the yoghurt and dollop on top of the salad.
Easy, quick and very scrummy!