Christmas lentil bowl

I wanted to make an easy dish to fall back on for those times over Xmas when you think no one will want more than a bowl of soup in the evening.   A soup does it for me when I’ve over-indulged at lunch (I’m talking serious souping with loads of ingredients, not just a watery brew).  However, it doesn’t tick the box for everyone, and I couldn’t face despondent looks at this festive time of year with my ‘there’s soup if you want’.
So, this Christmas I’m prepared.

I cooked a thick lentil soup on the weekend, nothing fancy, just some added veg and herbs plus red miso at the end to give it more depth of flavour.

Once cooked I drained the liquid and spooned the lentil-veg onto a bed of lemony tahini.  On top of that, a green and red Xmas vibe:  roasted cavalo nero leaves (kale works), and red chicory.  Sadly the red chicory roasted to an blah brown so instead I added a few small twigs of redcurrant.  Those pops of sweet-sour berries were a delicious addition (pomegranate would also work).
So easy, a plate of Christmas lentils!

Ingredients (for  4)

200g-300g dried lentils (anyones you like – brown, puy, beluga). Best soaked overnight (see previous blog for my soaking rant).  I always cook more than needed because you can never go wrong with some extra lentils in the fridge.
couple tbsp olive oil
1 large carrot, chopped
1 leek, green part only, chopped
handful of small broccoli and/or cauli florets, or any chopped greens
2tbsp chopped parsley
1 tbsp red miso paste – and/or tamarind paste if you love that flavour to stir in once the lentils are cooked
Enough veg broth (or water) to cover the lentils to cook. Add more liquid if they are soaking up liquid quicker than you thought

Tahini sauce:

3 tbsp tahini
2-3 tbsp lemon juice (I love lemon)
2-3 tbsp water
1 tsp harissa paste (if you like spicy, otherwise some miso paste)
Salt and pepper to taste

To roast:

3 long leaves cavalo nero, torn; or generous handful chopped kale
a few tbsp olive oil to rub and roast
optional:   1/4 tsp harissa or tamarind paste added to the oil
Decorate with sprigs of redcurrant or pomegranate for a sweeter red finish


Method:

Pour small amount of olive oil in the pot, then add the chopped leek, parsley, carrots or any other root veg, plus chopped greens if you like.  Gently fry.   I add the broccoli and cauliflower half-way through so they have a bit of a bite, but you could add them now.
Add the soaked-overnight-then-rinsed lentils and cover with veg broth or water. Cook until soft but not mushy.  Don’t forget to add any greens or broccoli etc halfway through.
Usually I taste after 10 minutes as some types of lentils cook faster than others.

At this point, drain any liquid that’s left.  Either keep the liquid to have any left-overs as a soup (this is me 🙂
Or toss.
I then add the red miso and spoon it through the cooked lentil-veg (add a little water if it has gone thick in your fridge).

Meanwhile, rub your torn green leaves with olive oil.  You could mix a smidgeon of harissa or tamarind into the oil if you love the taste.
Roast in a medium oven for about 10 minutes till crunchy.  Not burnt!  You’ll be near the oven, cooking your lentils, making your tahini sauce, so you can hover and check those leaves.

For the tahini, whisk together all the ingredients, adding water slowly as you want a consistency that’s slightly thick and smooth, but not runny.  It’s a sauce not a liquid dressing. Go easy with the harissa if you’re wary of too-spicy.

Now layer up.  Spoon the tahini sauce onto your plate then add a mound of lentil-veg and top with crunchy cavalo or kale leaves.  Red currants on the peak!

Merry Lentil Christmas to you all!

Lentil bolognese

Over the years I’ve tried variations on this lentil bolognese theme and it’s now grown into a delicious concoction of tried and tested recipes.  Packed with vegetables it cooks into a deep, rich-flavoured stewy-type sauce.
I often use puy lentils as they hold their form well, but brown lentils also work although they can become mushy if overcooked.  Best to do a taste test after c 20 mins to see if their texture is to your liking.

Last weekend I thought this recipe might work with a Christmas vibe, so I added cranberries and chestnuts to the base veg mix.
I probably added them to the pan too soon!  Most of the fab sour-fruitiness of the cranberries was cooked away, plus I couldn’t really taste the chestnuts.  On my second attempt the other night, I stirred in a handful of fresh cranberries for the last 8 mins of cooking.  Gave the whole dish a very festive look.

So, if you feel like a change over the silly season, a rice or pasta dish instead of roasted everything, then give it a try.  Perhaps even a dollop of cranberry sauce on top!

Some lentil advice:

I always soak lentils despite packet instructions, or the powers that think-they-be, claiming it’s not necessary as they’re small.

Small or not, they belong to the  pulse/bean/legume family, and this family contains oligosaccharydes, a type of carbohydrate (it’s the ‘O’ in FODMAP* ….ohhh!).
Our gut microbes break down these carbs, and in doing so, produce beneficial compounds but also gases which can cause bloating/wind/discomfort for some.
Soaking overnight will reduce the amount of  ‘Os’  and make them easier to digest.  And this soaking will also reduce the amount of phytic acid that we mainly find in the outer layer of the pulse, something that can interfere with enzymes that help us digest.  Phytic acid also binds to minerals in our food, and can prevent their absorption.  We need minerals!  Our calcium, magnesium, iron, zinc, potassium….so there’s only gains to be had by soaking those lentils!
Ok, enough lentil chat.

Ingredients

serves 4, with rice or pasta

160 g soaked lentils. I used puy but try others; be aware of cooking time as some turn mushy
3 tbsp olive oil
1 onion, finely chopped
1/2 leek, green part, chopped
1 stick celery, chopped
1 large carrot, chopped
3 large or 4 small garlic cloves, pressed or finely chopped
1 can chopped tomatoes
2-3 tbsp Dorsetshire sauce (vegan type of Worcestershire sauce with no anchovies; Bonsan and The Condiment company are two examples of other vegan Worcestershire sauces)
1/2 litre vegetable broth plus half to one cup more added near the end of cooking IF you want your bolognese more liquid
leaves of 4 sprigs of fresh thyme
chopped fresh parsley for decoration

Method

Soak the lentils the night before, discard the water, rinse and sieve then you’re ready to start.

Add olive oil to a deep pan on a medium heat, and cook the onions until transparent.  Stir in the chopped leek and cook until slightly softened.  Add the celery, carrots, garlic and gently cook for about 15 minutes.  Then come the lentils, can of chopped tomatoes, tomato puree, veg stock and the thyme leaves.

Simmer on a low to medium heat for about 40 minutes until the sauce has thickened and the lentils are cooked to your liking (I usually do a taste test around 30-35 minutes or earlier, depending on the type of lentil).

For a Christmas flavour, add cranberries for the last 8 minutes of cooking and enjoy with brown or mixed rice, or any pasta your digestion loves 🙂


*FODMAP  stands for fermentable oligosaccharides, disaccharides, monosaccharides and polyols, a group of  short chain fermentable carbs which can cause distressing IBS-type symptoms.  The low FODMAP diet aims to exclude/reduce the amount of these in your daily foods and then try a slow introduction of each type to see which may be your symptom trigger.  This diet is only meant to be short-term as it’s very restrictive.

Chilled cucumber soup

The last few months have been hot, hot, hot.  Out in Kefalonia, late May began to feel like the thick of a tinder-dry August; back here in England we may be having the sunniest start ever to our summer!  I half expect to hear those Mediterranean cicadas take up their daily buzz in our Dorset garden.
So yes, it’s been perfect salad weather except after two months of variations-on-a-salad I’ve had my fill, so here’s a delicious chilled soup to cool you off, an old recipe of my mum’s from those salad days (sorry, couldn’t resist) growing up in Sydney.

There’s nothing hard about this recipe, in fact I could’ve almost called it a smoothie but that really doesn’t do its delicate flavour justice.
Cucumber is naturally the star ingredient, so do check that your guests love it (some really don’t!)

Many of the other components are interchangeable, replacable, whatever your garden or fridge yields.
Instead of basil you could use more dill or mint; instead of dill you could pick some fronds off that rampant fennel plant.  Instead of lime, there’s lemon.  I’ll stop here…
Perhaps the only hard part is the planning.  This soup needs at least 4 hours in the fridge before you serve it.  I tend to cool it overnight to make sure it really is CHILLED and will therefore give me that rush of cold I’m hankering for when the sun is dialled up high.

Ingredients for two

1 large cucumber (c 400g)
150g yoghurt, either Greek or plant-based
30g olive oil
juice from 2 lime
2 pressed garlic cloves – or 3 to give it more of an edge
approx. 10 large basil leaves, give or take (I was limited to the number of leaves on my new basil plant)
2 tbsp chopped dill
2 tbsp mint – and extra for garnish
OR
1 tbsp chives for garnish
Sea salt and freshly ground pepper to taste

Method

Cut six thin slices off that cucumber for the final garnish, then roughly chop the rest and put it in a blender with the yoghurt, oil, garlic…everything, in fact, except the garnish (mint or chives, your call), and the decorative cucumber slices.
Blend until smooth, do the usual taste test and add whatever you’d like more of, and that’s it!

Refrigerate a minimum of 4 hours, but as I mentioned, overnight means you’ll be organised if it’s part of a feast the following day, plus it’s then guaranteed to be cold, and yes, it does seem to get a little more body overnight.

Ladle into two bowls, drizzle with a little oil, add garnish – and enjoy x

PS.  this bread alongside is delicious, an excellent gluten-free recipe I keep meaning to repost (but really you can simply google for yourself ‘life changing loaf’ from New Roots)


Green cannellini beans with rice

There’s good reason why cultures like Mexico, Africa or South America often eat rice with their beans.  By combining the two you get a complete protein meal with all 9 essential amino acids.  Beans are low in methionine (= amino acid), but rice is quite high.  Rice is low in lysine (another amino acid), but beans have good levels.  A perfect union!

This recipe has the added benefit of hemp seed and nutritional yeast, both complete proteins, albeit in small amounts, hence my suggestion to have rice alongside.  I usually choose a brown, red and basmati mix which I rinse twice before cooking.  Often I’ll add small florets of broccoli or grated carrot into the pot 3/4 way through the cooking time; another opportunity to increase vegetables in meals.

When it comes to protein you might like to listen to this interview on The Doctor’s Kitchen, with Rupi Aujla.  If it sounds like I’m banging on about protein it’s because I’m seeing really low intake in my clinic. With the message out there that people should be eating more plant-based foods, many are reducing their animal protein but not finding plant based alternatives.

Inspired by a recipe from Plantbaes I’ve changed some ingredients and amounts, replacing the spinach with kale or greens because raw spinach is high in oxalates which can interfere with our absorption of minerals necessary for strong bones and energy, hormones, immune health… you name it.  Easy to google ‘high oxalate’ foods if you want to go down this rabbit hole!

Ingredients:

1 tbsp virgin olive oil for cooking; another tbsp to drizzle before serving
4 medium garlic cloves, pressed
1 red onion, chopped
1 medium or 2 small courgette, sliced
1 bunch of basil, c 25 – 30g
50 g chopped kale and/or spring greens
2 tbsp cracked hemp seed
2 tbsp nutritional yeast
2 tbsp lemon juice
1  400g tin rinsed-twice cannellini beans
2 tbsp pumpkin seeds, for serving
sea salt and black pepper
plant-based yoghurt to dollop on top before serving

Optional: sprinkling of chilli flakes added to blender

Method

Whilst your rice is cooking, pour oil into a pan and add the chopped onion. Cook on a medium heat for a few minutes until transparent.  Next add the squeezed or finely chopped garlic, then the sliced courgette and kale/spring greens.  Cover and cook until the kale has softened.  Turn off the heat and add the basil leaves to the pan with cover and leave a couple of minutes.

Put the cooked greens and wilted basil into a bowl and add the lemon juice, nutritional yeast, hemp seeds, some sea salt and pepper (& a pinch of chilli if you want).  Blend with a hand-held blender, or add the lot to whatever blending machine you’re using.

Now’s the time to do a quick taste test!
If your green blend is thick because you used lots of kale, add a little water, however you still want it to have body and not be a runny sauce.  At this point add extra pepper, salt or chilli if your taste buds want.
Put the sauce back into the pan and add the rinsed cannellini beans, heating through and stirring now and again so it doesn’t catch.

When your rice is cooked spoon into two shallow bowls, add your green bean blend and then dollop a tbsp of plant-based yoghurt on top.  Garnish with pumpkin seeds, some basil leaves and a drizzle of oil.  Serve hot or at room temperature.
Enjoy and let me know how it goes 🙂


Gf Chocolate pear cake with raspberry coulis

We’ve had a birthday month – friends and family – so I wanted to try out some new gf recipes, as I’m on a mission to find a perfect one for a wedding next year.
I love this cake because for me hazelnut + chocolate = gianduja which is a fave chocolate of mine.  The cake obviously doesn’t rise, but the pears give it some height and style especially when dusted.
This photo below was my first attempt when I cut the pears into smaller pieces, but I now know quartered pears work best.
You can make it dairy free by using plant-based butter replacements.  I’ve not tried it yet but that’ll be my next taste test.
The raspberry coulis is optional.  Last time I baked it was for a birthday so we had whisked oat cream, raspberry coulis and ice cream for those who wished.  Went down a treat!

I think the cake actually tastes better after a day in the fridge!  Makes the chocolate slightly fudgy, but I’ll leave that to you.  It’s a tough call putting a freshly baked cake away for a day or more, 🙂 but Mr C agreed it tasted better after an overnight in our fridge.  Just saying 🙂

Equipment you’ll need:  23cm or 25cm loose-bottomed tin.
Nut/seed grinder or blender for dry ingredients
Whisk, hand mixer
Baking paper, cut into a circle to fit base
Sieve for coulis

Ingredients

For 8 delicious slices

90g butter (or plant-based), plus 1 tbsp extra for the tin (or use light olive oil for greasing the tin)
70g golden caster sugar, plus extra 1 or 2 tbsp to line the tin
100g 72% dark chocolate, broken up
3 eggs, separated
85g roasted hazelnuts, ground in a coffee or seed grinder
2 ripe large pears, peeled, halved, quartered and cored
icing sugar to dust when the cake has cooked

Method

Heat oven to 180 degrees C (160 fan).  Melt the chocolate and butter (or a butter replacement) in a bain-marie over a pot of hot water.  Stir gently when it’s melted; let cool.
Prepare your tin!
Rub butter or swish a little oil on the tin’s base and sides, then line the base with your circle of greased baking paper.
Find that extra caster sugar mentioned above, spoon and swirl so it sticks to the sides and paper base, tipping out any excess.

Separate your eggs and whisk the whites to soft peaks.  Put aside.

Clean your beaters, whisk the egg yolks with the 70g caster sugar until the mixture is thicker and paler.  Fold this into the cooled melted chocolate together with the ground hazelnuts.
Now add your peaked whites in batches, first, mix half into the chocolate, then gently fold the rest.  Don’t be too rigorous with your mixing ‘coz you want those whites to give your cake some lift.
Spoon your finished wet cake into the tin and arrange your pear quarters on top.

Bake for 30-40 mins.  Check with toothpick or skewer after 30 mins to see if it comes out dry.

Optional easy-peasy Raspberry coulis

This recipe is generous (I am always grateful for leftovers to freeze)

Ingredients

¼ cup caster sugar
2 tbsp water
300 g frozen raspberries, defrosted
optional:  1 tbsp Grand Marnier

Combine the water and sugar in a small pot, stirring till dissolved.  Add the raspberries and gently cook until they’re soft & falling apart.
Cool enough so you can strain it, using a spoon to mush it down through the sieve.  Add the Grand Marnier – or not – to the sieved berry mix and serve either warm, cold, or keep in the fridge up to a week (or in the freezer a couple months).

Serve the cake as is or with whipped df oat cream or regular cream or ice cream.  I know someone will be adding custard, whatever floats your boat!
Give it a try and do let me know what you think.

Roasted curry veg with herby yoghurt

After making this dish about six times in the last month I can truly say it’s become – yet another! – favourite.
It was inspired by Sarah Cobacho’s plantbased baked curry vegetables with raita sauce but I’ve added and tweaked, changed amounts and called the sauce a more prosaic, but equally scrummy, ‘herby yoghurt’ as raita means something else to me.   I’m so happy to have found Sarah’s delicious recipe to play with and reinvent.  I hope you enjoy playing as well, and making it your own.

Ingredients

2 very generous servings… or 4 modest ones

The herby yoghurt sauce:

250 g plant-based yoghurt (I used Greek-style Koko or Alpro; thicker, creamier than most other plant-based)
1 heaped tbsp grated ginger
2 cloves garlic
juice of one lemon
1/2 tsp cumin
1/2 tsp garam masala
small bunch coriander, (chopped = about ½ compact cup)
small bunch mint, chopped = c ¼ cup)
chili flakes (optional, for the chili lovers out there.  The roasted veg below also have some chili)
sea salt to taste

The veg and protein:

350g small or new potatoes with skins, halved
½ small butternut squash, peeled, cubed
½ cauliflower, cut into florets
½ broccoli, ditto florets
1 red onion, cut into 1/8
150g cherry tomatoes
250g cooked chickpeas (I used left-over cooked lentils one time instead; also worked although I added them later, with the kale, so they kept soft)
big handful of shredded kale
40 g roasted slivered almonds, to decorate the finished bowls

The oil mix to slather

½ cup olive oil
1 tsp garam masala
dash, or more, of chili powder or flakes
2 tsp curry powder
juice of one lemon

Method:

Use three bowls – 2 small, one large – for your vegetables.  The two small ones are for the potatoes and kale resp. and the large will hold the rest of the vegetables and cooked chickpeas.
Mix all the oil ingredients together and massage into your respective veg bowls.

Preheat your fan oven to 180 C.
Blend the sauce ingredients at least 1/2 hour before needed so the yoghurt sauce isn’t too ‘sloppy’.  Ideally make the sauce ahead of time, the day before, and refrigerate.
As always, taste test to see if you want to add more of any sauce ingredient you especially love.

Place the halved and oiled potatoes on the oven tray and roast for 15 minutes.  Flip over and add the rest of the vegetables and chickpeas (not the kale), and roast for another 20 minutes, adding the oiled kale for the last 10 minutes.  Test with a fork to make sure it’s the texture you like, and be mindful nothing roasts ‘dry’ or burns.

To serve: spoon the green yoghurt sauce into the base of the bowls, then top with roasted vegetables and chickpeas.  Scatter the roasted almonds on top, delicious!

Butternut soup

A hearty soup for this week’s cold snap, here’s a butternut, sweet potato & carrot combo which is a powerhouse of fibre, vitamins and minerals.
The colour alone tells us it’s loaded with beta carotene.  This is an antioxidant we convert to vitamin A, which supports our immune health, our vision, skin, reproduction, lungs, heart… & the list goes on.
Such a well tolerated soup, I always share it with clients who want an easy nourishing recipe.
And if you’re not a fan of garlic just leave it out; same with the onion (or you could try replacing it with the green part of a leek).
This soup freezes really well, so it’s ideal for batch cooking.

Ingredients

(for 6 small or 4 large soup bowls)

Olive oil, a generous dollop
1 red onion, chopped
500g butternut squash, roughly chopped
200g sweet potato, also roughly chopped
200g carrot, ditto…
2-3 garlic cloves, squeezed
fresh ginger, 3 cms peeled & finely chopped
1.2 litre veg broth
lime juice from 1 lime (optional)
coriander leaves to decorate
pumpkin or sunflower seeds also to decorate (missing in the photo, oops!)

Method:

Gently heat the olive oil then add the chopped onion and stir occasionally until transparent.  Next add all the vegetables and half the chopped ginger.  Stir briefly before pouring your broth into the mix.
Cook on a medium heat for about half an hour until the vegetables are soft, then add the squeezed or chopped garlic cloves and the rest of the ginger.  Adding these at the last minute will mean their flavours are more potent, and the beneficial phytonutrients in the garlic and ginger not completely ‘cooked away’.
Cool a little before blending, then add the lime juice and decorate with sprigs of coriander or parsely, and toasted or raw pumpkin seeds. Drizzle with a little olive oil and enjoy!


Glenys’ vegan oriental rice

Sometimes we need easy and straight-forward recipes especially if juggling work and life.  This rice dish has been in my heart and on our family table for many years.  It’s one of several a dear Sydney friend, Glenys, shared a long time ago, written in her lovely script in my now raggedy falling-apart recipe book.  Everytime I make a Glenys dish it’s such a mindful meander down memory lane I want to call her instantly, then I realize it’s way past midnight in Sydney.


Growing up, I was never a fan of rice salads.  Usually very white, sometimes gooey, and not enough going on in them to win me over.   The combo here of snibbled crispy veg with nutty and/or seedy crunch plus the tamari-lemony garlic works a treat.
I can’t say I’ve found any other rice salads I love as much apart from one with lentils, so if you have a secret scrummy rice salad please share with me anywhere you want – text, email or even snail mail (how I’ve loved these past weeks of hand-written post! Thank you to all snail mailers, let’s keep it going xxx)

This salad could be part of a shared feast, or enjoy with supper or lunch alongside any protein you love.
Do tweak the amount of tamari or garlic or lemon so it suits your tastebuds before you lavish it over your finished creation x

Ingredients

For 4

250g  brown or mixed rice (eg.wild, red & brown basmati)
5  spring onions (or 3 large ones), finely chopped
1 red & 1 green pepper, finely chopped
2 smallish carrots, finely chopped
3 tbsp sunflower and pumpkin seeds
150 g almonds, toasted and roughly chopped (last time I used some left over delicious Spanish Marcona almonds and didn’t roast);   1 tbsp to decorate at the end
150g cup currants (soak if you’ve had them stored far too long, overnight or at least 6 hours)
One generous handful, or 120g each, of chopped coriander and parsley

Dressing:

120g cup olive oil or avocado oil
3-4 tbsp gf tamari sauce (start with 3 then taste test and adjust if necessary)
3 tbsp lemon juice (ditto)
2 cloves garlic
sea salt & freshly ground pepper to taste

Method

Cook the rice and let cool.  Meanwhile toast the skinned almonds until golden brown, cool and chop roughly.  Mix all the finely chopped vegetables and herbs with the currants, nuts and/or seeds, and the cooled rice.
Pour over dressing and mix; top with tbsp chopped almonds.
Can’t get much easier, right?

Vegan savoury strudel, gf and df

This recipe was inspired by Elke’s Austrian take on a Greek spanakopita (spinach pie).  Instead of the usual triangle slices of a traditional spanakopita, she opted for the strudel “log” shape, and added loads more delicious spinach than one normally finds in these pies.
I’ve tweaked the recipe yet again by adding more vegetables to the spinach.  So it’s no longer a spanakopita but a roasted sweet potato, spinach and leek ‘strudel’!  And with a gluten-free puff pastry and dairy-free fetta; a vegan version to see how it works.
Worked a treat!

The store-bought ‘Jus-roll’ gluten-free puff pastry makes it all so very easy and quick.  And Violife’s vegan Greek fetta is delicious and a great option for anyone going vegan, or with a casein (dairy protein) or lactose intolerance.
You can steam the sweet potato cubes, definitely the healthy option, but as I was roasting a lunch the day before I decided to add the sweet potato cubes to the oven; also the pine nuts right at the end.  Less work the following day when I was playing with this recipe.

Ingredients:

For six slices

1 packet Jus-roll gluten free puff pastry (or regular Jus-roll puff; or filo.. shortcrust, whatever you like)
400g packet spinach, roughly chopped
green part of one leek, finely sliced
3 cloves garlic, squeezed (two at the start, one added near the end)
1 large sweet potato, about 250g, cubed, then either roasted or steamed before you start your log
dollop of olive oil for a light fry and to lightly brush onto the log before baking
80g toasted pine nuts
100g Violife ‘Greek white’ (or non vegan, regular Greek fetta)

Method:

If you haven’t roasted your pine nuts, nor your cubed sweet potato, do this first.  When done put aside where no one will be tempted to have a nibble.

For the filling, pour a couple of tablespoons of olive oil in a pan on a medium heat then add the sliced leek and 2 of the pressed garlic.  Gently fry until the leek’s transparent.
Toss in the roughly chopped spinach and wilt.  Hover near the pan otherwise your delicious leafy spinach pile will vanish to an overwilted green sludge.  The same goes for the pine nuts, keep close, for if you leave the kitchen even for a moment they are bound to burn.  Hover.  Keep watch.

Add the roasted/steamed sweet potato cubes to the pan of spinach to warm through, then that last garlic clove.  Stir in the roasted pine nuts.

Wait for everything to cool before adding the crumbled fetta.

With ‘Jus-roll’ you can literally unravel it from the box and start filling it with your cooked veg, so easy.
However, if it’s too thick for your taste roll it thinner and larger.  Whatever you decide, ensure you have parchment underneath it (the paper it comes wrapped in its box), so you can easily lift the filled roll onto the oven tray.

Spoon the filling along the long side of half the pastry, leaving a clear 2-3 cms edge all around so you can seal it without the filling oozing out.  To make your log just fold over the pastry and, with water-wet fingers, press the edges closed then go over them with a fork to create a neater, tighter finish.  Brush with oil and prick the pastry, to stop a gap forming inside as it cooks.

Bake in a moderate fan oven, about 180 C degrees (c350 F), until light golden brown, approx 30 – 45 mins (depending on everyone’s unique oven.  Like us, they have personalities and might decide to take longer to colour your strudel).

Slice and serve with a leafy colourful salad, or as part of a delicious summer garden spread.

Kali oreksi! Bon appetit x


GF/DF vegan mushroom lasagne

I’ve based this recipe on Ottolengh’s fab spicy mushroom lasagne from his ‘Flavour‘ recipe book, making the necessary changes so that it’s suitable for vegans, as well as gluten and dairy free.

This recipe is true to Ottolenghi’s exotic cooking style; definitely not a whip-it-up-quickly meal.  The layer upon layer of a lasagne translates to several ‘meanwhiles’ in the method section, but don’t let that put you off.  This is truly a recipe to enjoy, a lesson in being present with all the processes in play, from chopping to blending, roasting, soaking.  You name it, it’s happening here!  And this is why it’s such a winning recipe, all these delicious layers upon layers.  I’ve numbered the steps, which wasn’t in the original, but I think it might’ve helped me along.

Luckily a lot can be cooked in advance – always good news. An asterisk marks the point you can prepare it the day before refrigerating overnight.

Instead of the original Ottolenghi double cream, parmesan and pecorino I’ve used oat cream, vegan cheddar and a gluten & egg-free lasagne like Freee rice lasagne, easy peasy.

An aside: many cheeses like parmesan and pecorino (in the original recipe) use animal rennet  – eg. from sheep’s stomach – in the cheese-making process. There are, however, vegetarian rennets readily available so check your cheese labels, or stick to the vegan cheddar-lookalike I’ve used here. Perhaps where you live there are also vegan parmesan-type cheeses? (also perhaps where I live, but they’ve eluded me 🙂 Do share if you’ve found them).

Ingredients:

For 6 people
Equipment: large cooking pan, large and small bowls, sieve, measuring jug, food processor (or very sharp chopping knife… and some willing helpers!), rimmed oven baking tray, rectangular baking dish 30cm x 20 cm, and probaby a few other bits I’ve forgotten, but I’ve listed the stand-outs for me

800g chestnut mushrooms halved
500g oyster mushrooms, roughly chopped
60g dried porcini mushrooms
30g dried wild mushrooms
130ml olive oil
chilli, 2 dried, roughly chopped.  If you like extra hot, leave in the seeds
1 red onion, peeled, quartered
5 garlic cloves, chopped or grated
500 ml hot veg stock
1 medium carrot, rough chunks
2 tomatoes c 250g, quartered
80g tomato paste
130ml oat cream
160g Violife grated vegan cheddar cheese,  or another vegan ‘hard cheese’ equivalent (or two different ones)
5g basil leaves, finely chopped
10g parsely leaves, finely chopped
250g Freee Rice lasagna, or a vegan lasagna of your choice
sea salt and ground pepper to taste

Method

1) The oven:  Preheat to 230 degrees C fan oven (250 conventional oven; 446 Fahrenheit).

2) The fresh mushrooms: Either chop by hand or put the oyster and chestnut mushrooms into a food processor in batches, and pulse till finely chopped.  Add to a large bowl with 4 tbsp of the oil and 1 tsp salt, mix, then spread on a large parchment-lined rimmed baking tray so that it’s an even layer.
Bake for 30 minutes, stirring a few times so it doesn’t catch.  The result will look considerably less as a lot of the water has been baked away.  All good!
Remove and put aside, then turn down the oven to 200C (c. 390F) and sit with a cuppa whilst you read on…

3) Meanwhile, the dried mushrooms:  Combine in a medium bowl both sorts with the chilli and your hot veg stock.  Let soak for half an hour then strain the liquid, squeezing as much as possible from the mushrooms so you end up with c340 ml (just top up with water if you have less, or squeeze those ‘shrooms a bit more).
Set aside the liquid.  Chop the rehydrated mushrooms and finely chop the chilli, and also set aside.

4) Now to the onion, carrot and garlic!  Chop them in the food processor – or by hand – then put into a pan with 60ml of your olive oil and fry for 10 mins, stirring till soft and golden.

5) The tomatoes:  Pulse them in the food processor till finely chopped and add, together with the 80g tomato paste, to your fried onion/carrot pan.
Salt and pepper this to your taste and cook for about 10 mins, stirring now and again.

6) Add the chopped chilli and all the mushrooms – those roasted ones, the rehydrated ones – to your carrot/onion/tomato pan and cook for 10 mins.

7) The ‘ragu’ (or ragout, whatever you prefer), is almost there, hooray!  Stir in the reserved stock and 500ml water.  Simmer for 20-30 mins, adding more water if your meaty-looking ragu looks like it’s getting too dry.
Stir in 100 ml oat cream and simmer another few minutes (just to ensure it’s well mixed).  Remove from the heat, and sit back, take a slow breath and be happy that you have just created a delicious meaty-textured mushroom ragout which you will now (or tomorrow) layer into a lasagne.
* At this point you can pop it in the fridge, covered, and continue the following day.

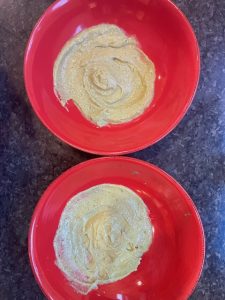
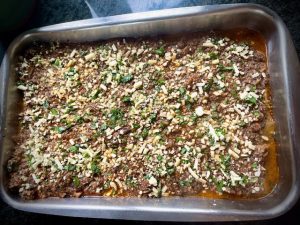
8) The cheese:  Mix the grated vegan cheddar (and/or parmesan-ish vegan cheese) and the chopped basil and parsley in a bowl and prepare to start assembling your layers.

9) Layering your lasagne:
Spread approx 1/3* the mushroom ragu in the bottom of a 30cm x 20cm rectangular dish.
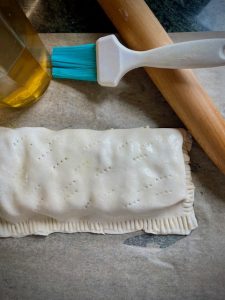
Top with approx 1/3 of cheese mixture, then top this with your lasagne sheets, breaking it into bits to fit corners.
*Ottolenghi states 1/5, not 1/3.  I’ve made this three times now, and so far 1/3 works best for me.
Repeat until you finish with a final layer of mushroom sauce and vegan grated cheese.

10) drizzle 1 tbsp oat cream and 1 tbsp oil and cover with foil or baking paper.
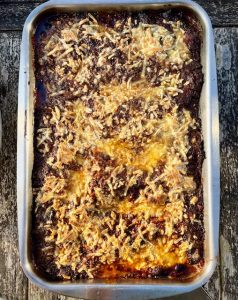
Bake approx 15 mins before removing the foil/paper.
Increase your oven temp to 220 C fan (240C conventional; 425 F) and bake another 10 minutes, turning your rectangular dish around so everything is evenly browned.
11) Set aside to cool, drizzle over the remaining cream and oil and sprinkle with parsley.

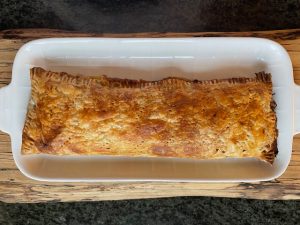
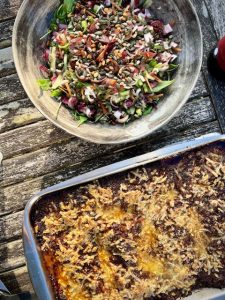
12) Bravo! You’re ready to serve.
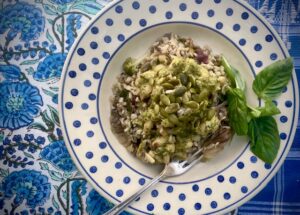
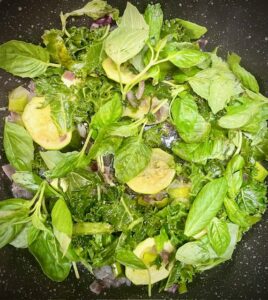
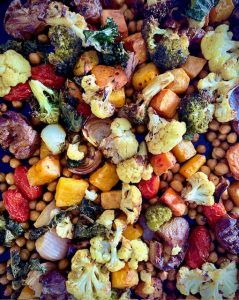
And after all this, just a leafy green salad with chopped herbs and any other salady bits you have at hand will be perfect 😉

A nerdy note to share with practitioners/foodie peeps trying a low FODMAP diet*
(For all other readers, you’ve been warned!)
:

I was working with three SIBO clients, all keen on the low FODMAP* diet, at the time I was playing with this vegan version. I decided to try turning this recipe into a low FODMAP (why???  Most mushrooms, tomato, tomato puree, garlic, onion, chilli…are all high FODMAP foods).
Yes…. well, there was a wild-eyed glimmer of hope when I saw that oyster mushrooms are low in FODMAPS.  Tomatoes, too, in small amounts, ie. 45g of chopped and 25g tomato paste, according to the Monash FODMAP guide
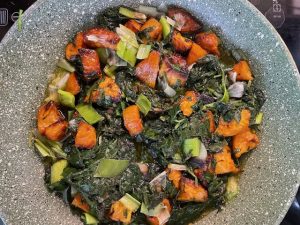
So I only used oyster mushrooms and a smaller amount of tomato and paste.  I replaced the onion, high FODMAP, with the chopped green part of a leek (low).
No chilli as it’s high FODMAP, hey ho, so the ‘spicy’ component of the recipe vanished.  However, any of my clients with SIBO related gut distress will totally go along with this.  I made more of the basil by making an olive oil, basil, pinenut type pesto (pine nuts are low FODMAP nuts).
Aged dairy cheese is a lower FODMAP food, but sticking to the vegan option you can use something like Violife’s grated ‘mature’ ,as I’ve done in the above vegan recipe, as it’s free from dairy, preservatives, lactose, gluten, nuts and soya.

For those who have stuck to the end of this read, huge congratulations!  This low FODMAP version is indeed a very different meal to the one I’m posting today, but it was very tasty plus a good option for anyone who loves mushrooms and wants to add to their low FODMAP vegan repertoire.

*Low FODMAP diet is a short-term diet restricting certain poorly absorbed carbs which can ferment in the colon and cause IBS-ish discomfort in some people.  Some clients do very well on it, as it can calm down inflammation and give the GI tract a break whilst waiting for the results of tests, or trialling some supplements.  It should, however, only be a short-term diet as it excludes too many health-giving foods.
Btw FODMAP is the acronym for the carbs which are too many and complicated to write in the swing of a recipe, but FYI it stands for: fermentable oligosaccharides, disaccharides, monosaccharides and polyols.  FODMAP, much easier, right?